Visualize real-time sensor data from Azure IoT Hub using Azure Web Apps
[!NOTE] Before you start this tutorial, make sure you’ve completed Setup your device. By Setup your device, you set up your IoT device and IoT hub, and deploy a sample application to run on your device. The application sends collected sensor data to your IoT hub.
What you learn
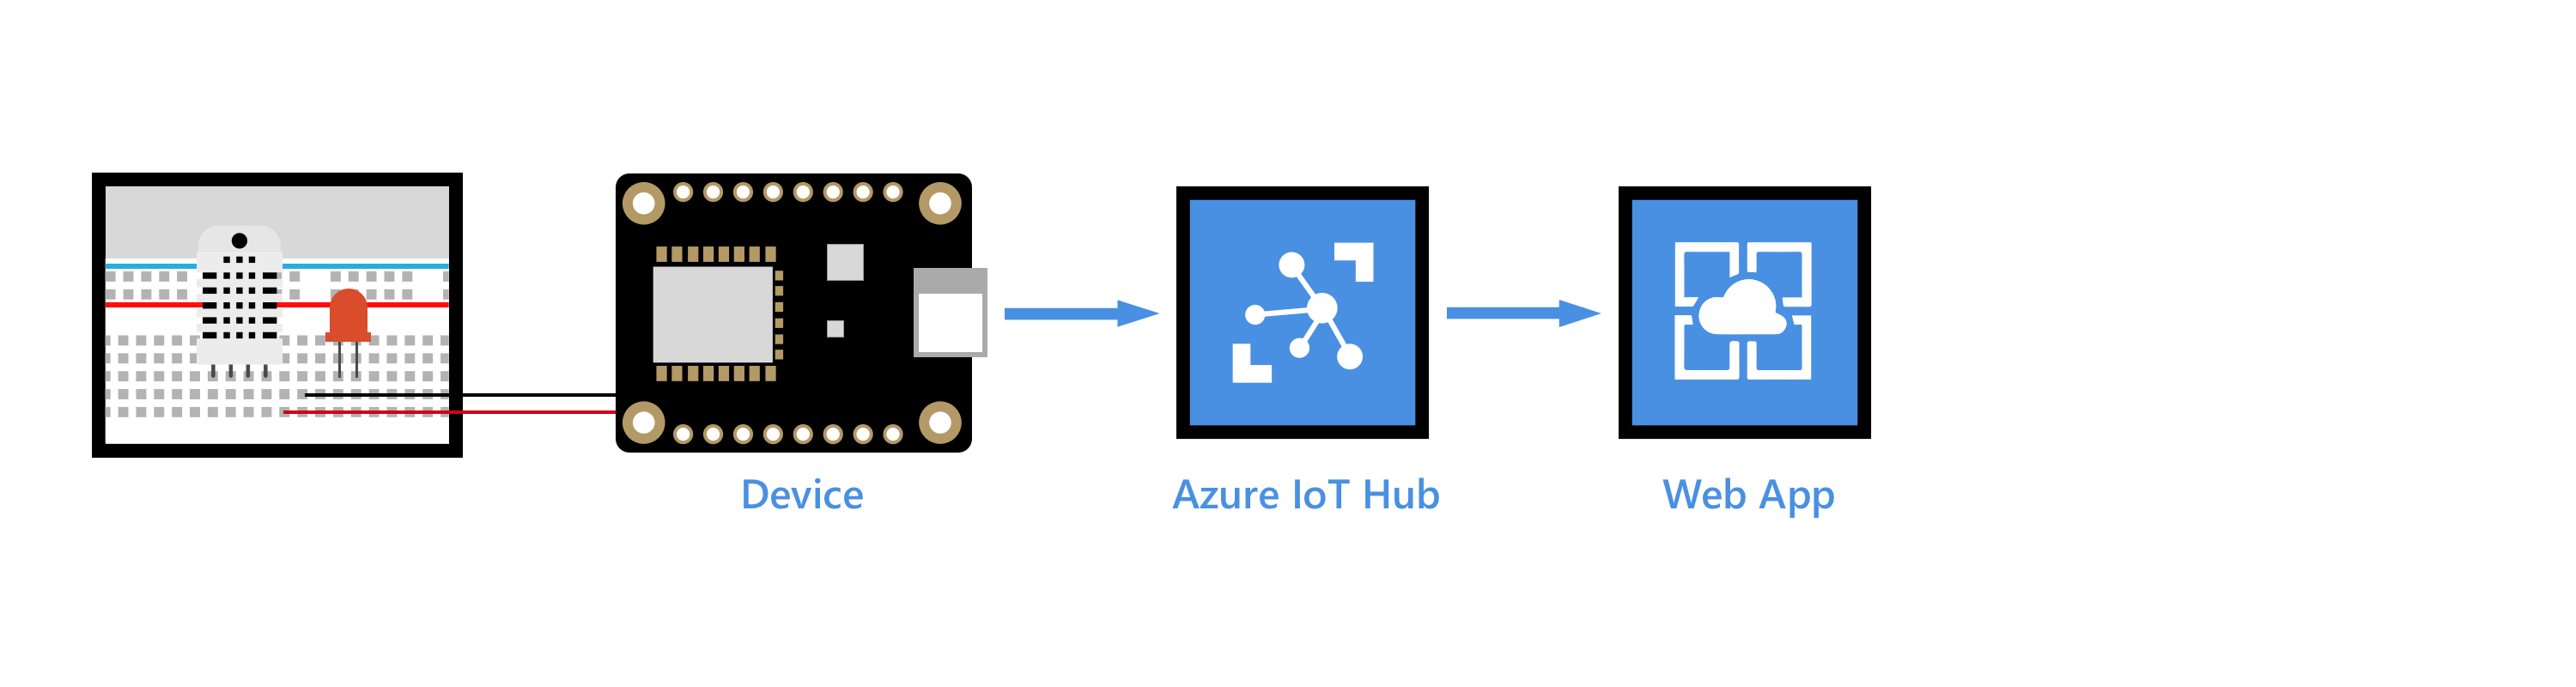
In this lesson, you learn how to visualize real-time sensor data that your Azure IoT hub receives by running a web application that is hosted on an Azure web app. If you want to try visualize the data in your IoT hub with Power BI, please see Use Power BI to visualize real-time sensor data from Azure IoT Hub.
What you do
- Create an Azure web app in the Azure Portal.
- Get your IoT hub ready for data access by adding a consumer group.
- Configure the web app to read sensor data from your IoT hub.
- Upload a web application to be hosted by the web app.
- Open the web app to see real-time temperature and humidity data from your IoT hub.
What you need
- Tutorial Setup your device completed which covers the following requirements:
- An active Azure subscription.
- An Azure IoT hub under your subscription.
- A client application that sends messages to your Azure IoT hub.
- Git. (Download Git).
Create an Azure web app
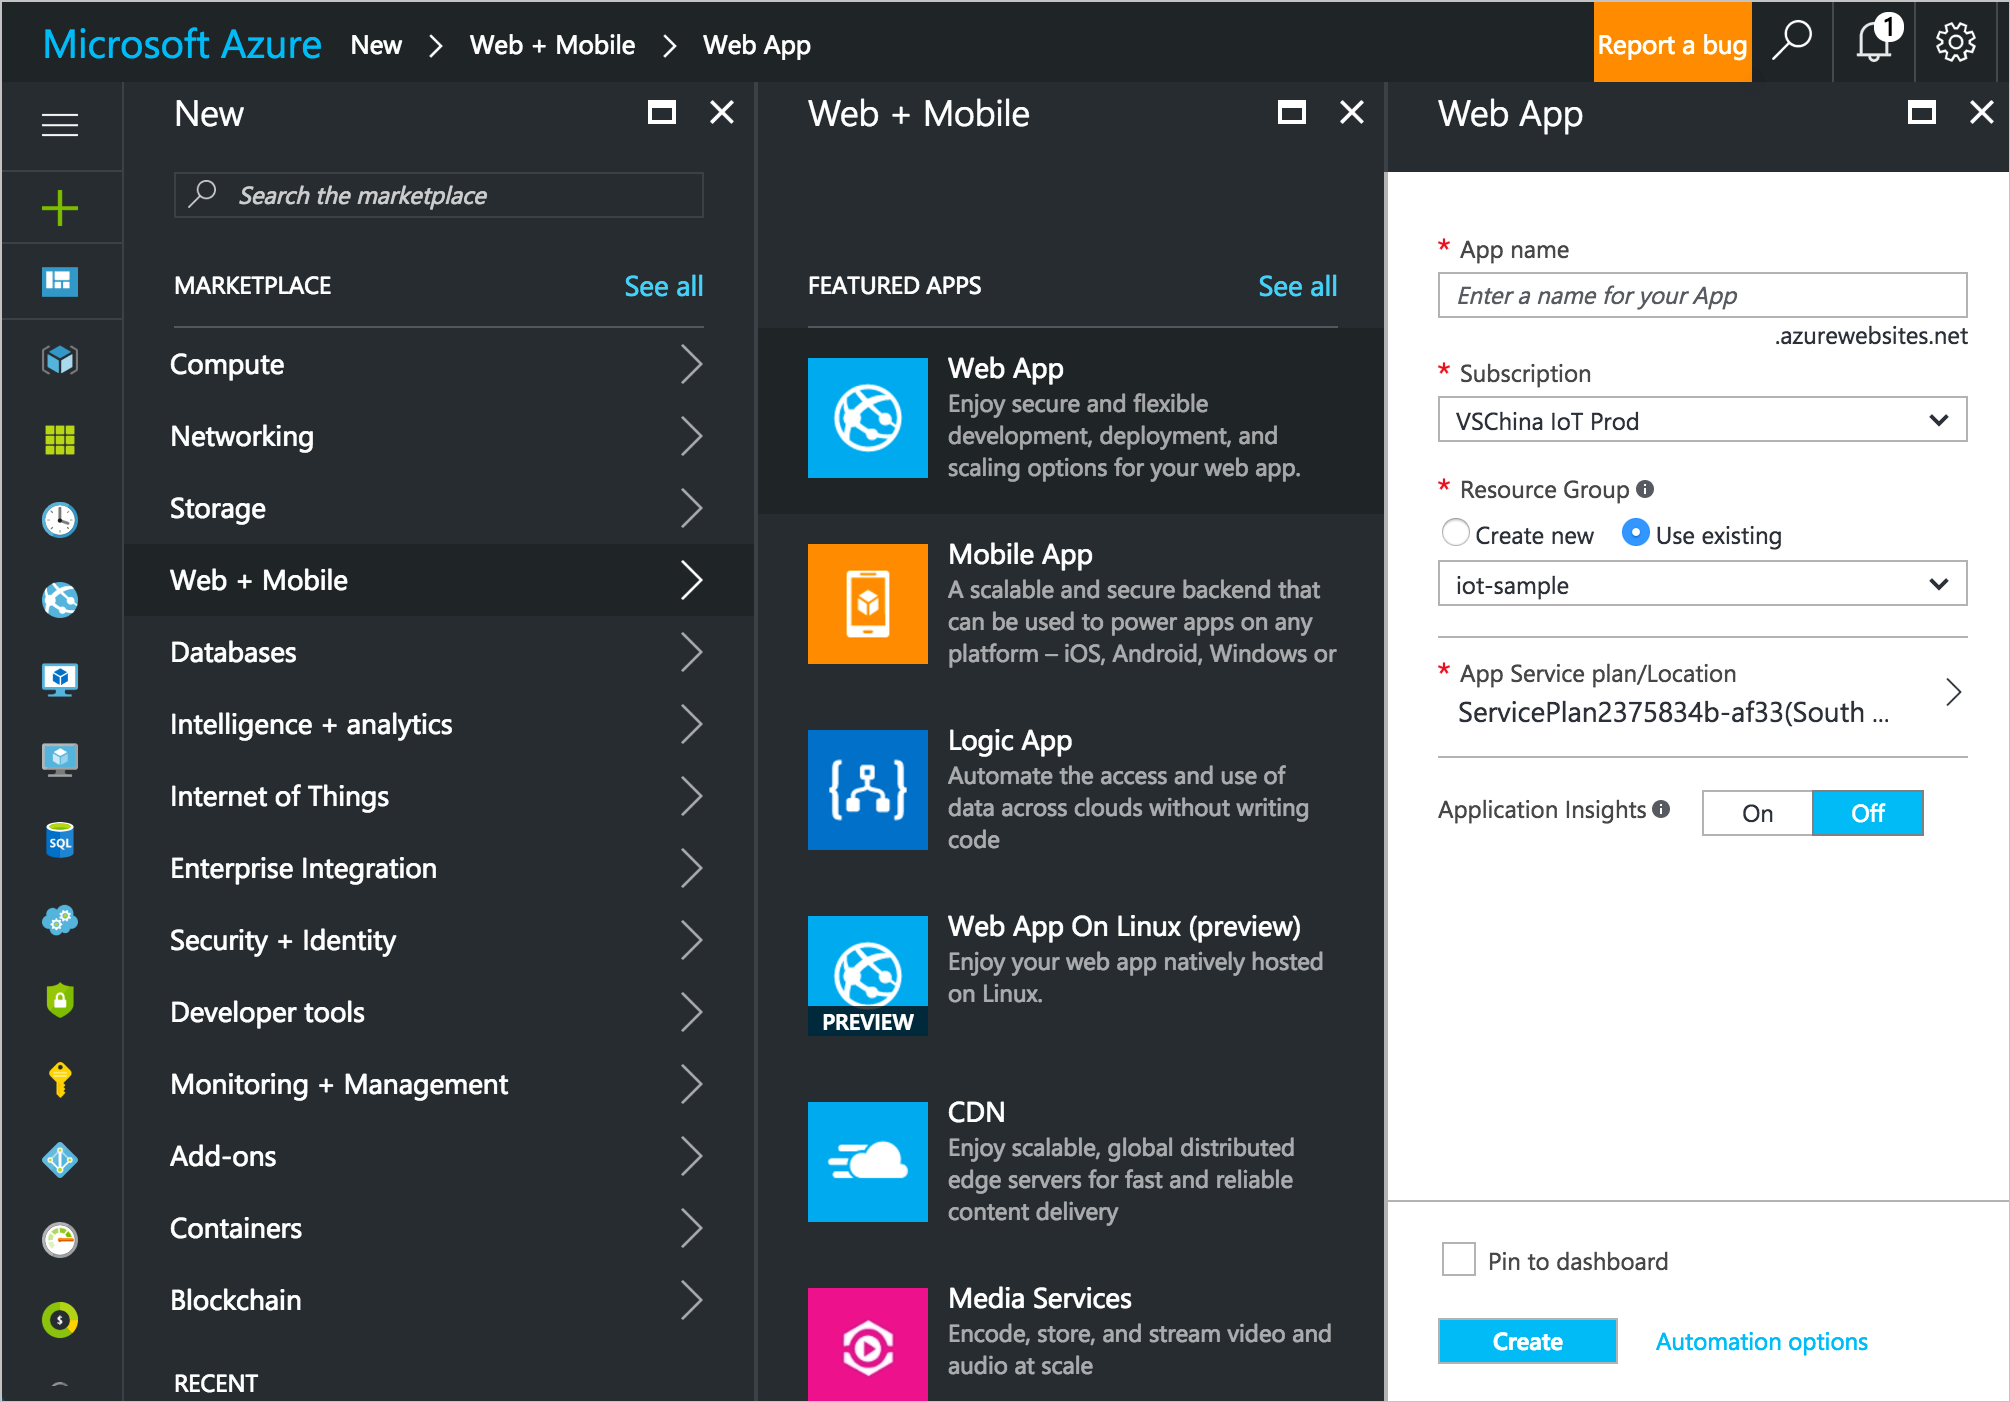
- In the Azure portal, click New > Web + Mobile > Web App.
Enter a unique job name, verify the subscription, specify a resource group and a location, select Pin to dashboard, and then click Create.
We recommend you select the same location where your resource group is located. This assists with processing speed and reduced costs for data transfer.
Add a consumer group to your IoT hub
Consumer groups are used by applications to pull data from Azure IoT Hub. In this lesson, you create a consumer group to be used by a coming Azure service to read data from your IoT hub.
To add a consumer group to your IoT hub, follow these steps:
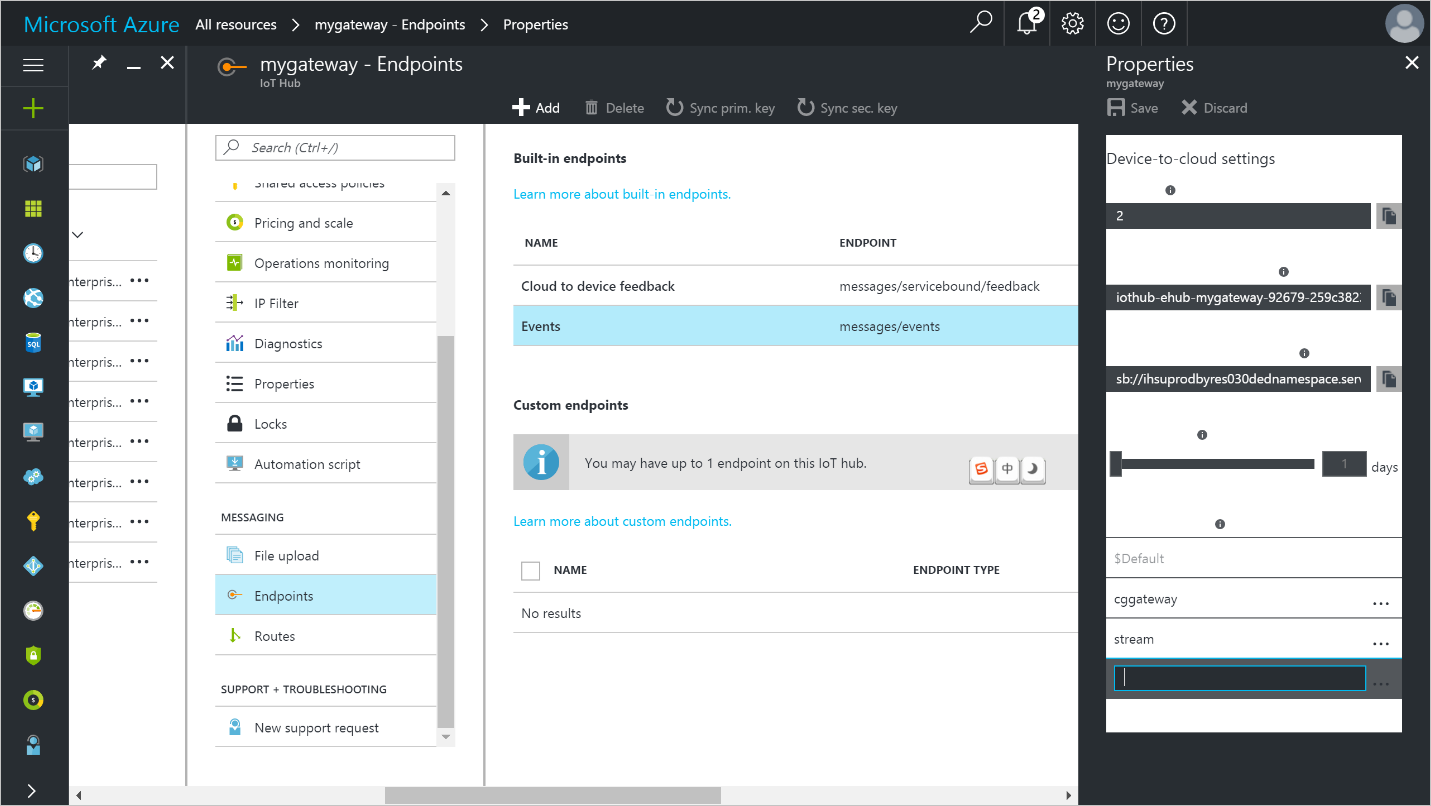
- In the Azure portal, open your IoT hub.
Click Endpoints on the left pane, select Events on the middle pane, enter a name under Consumer groups on the right pane, and then click Save.
Configure the web app to read data from your IoT hub
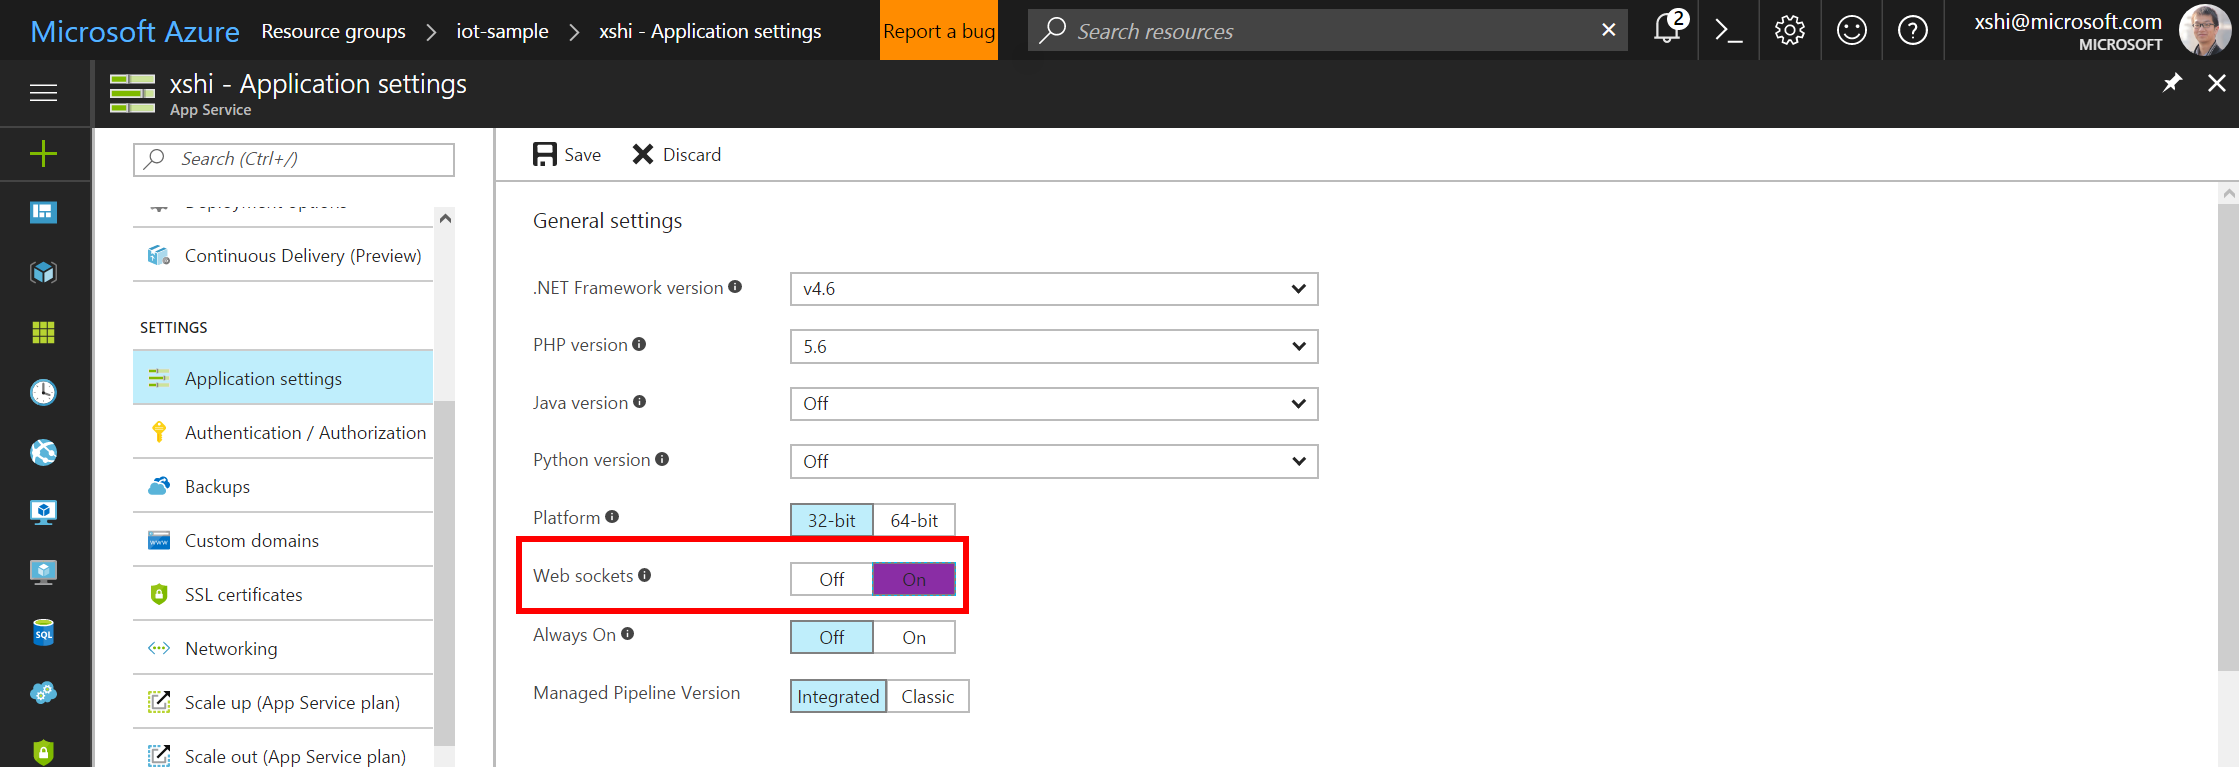
- Open the Web app you’ve just provisioned.
Click Application settings, and then add the following key/value pairs under App settings: see the table at the end of the steps.

In Application settings, toggle the Web sockets option under General settings.
| Key | Value |
|---|---|
| Azure.IoT.IoTHub.ConnectionString | Obtained from iothub-explorer |
| Azure.IoT.IoTHub.DeviceId | Obtained from iothub-explorer |
| Azure.IoT.IoTHub.ConsumerGroup | The name of the consumer group that you add to your IoT hub |
Upload a web application to be hosted by the web app
We made available a web application on GitHub which displays real-time sensor data from your IoT hub. All you need to do is to configure the web app to work with a Git repository, download the web application from GitHub and upload it to Azure for the web app to host.
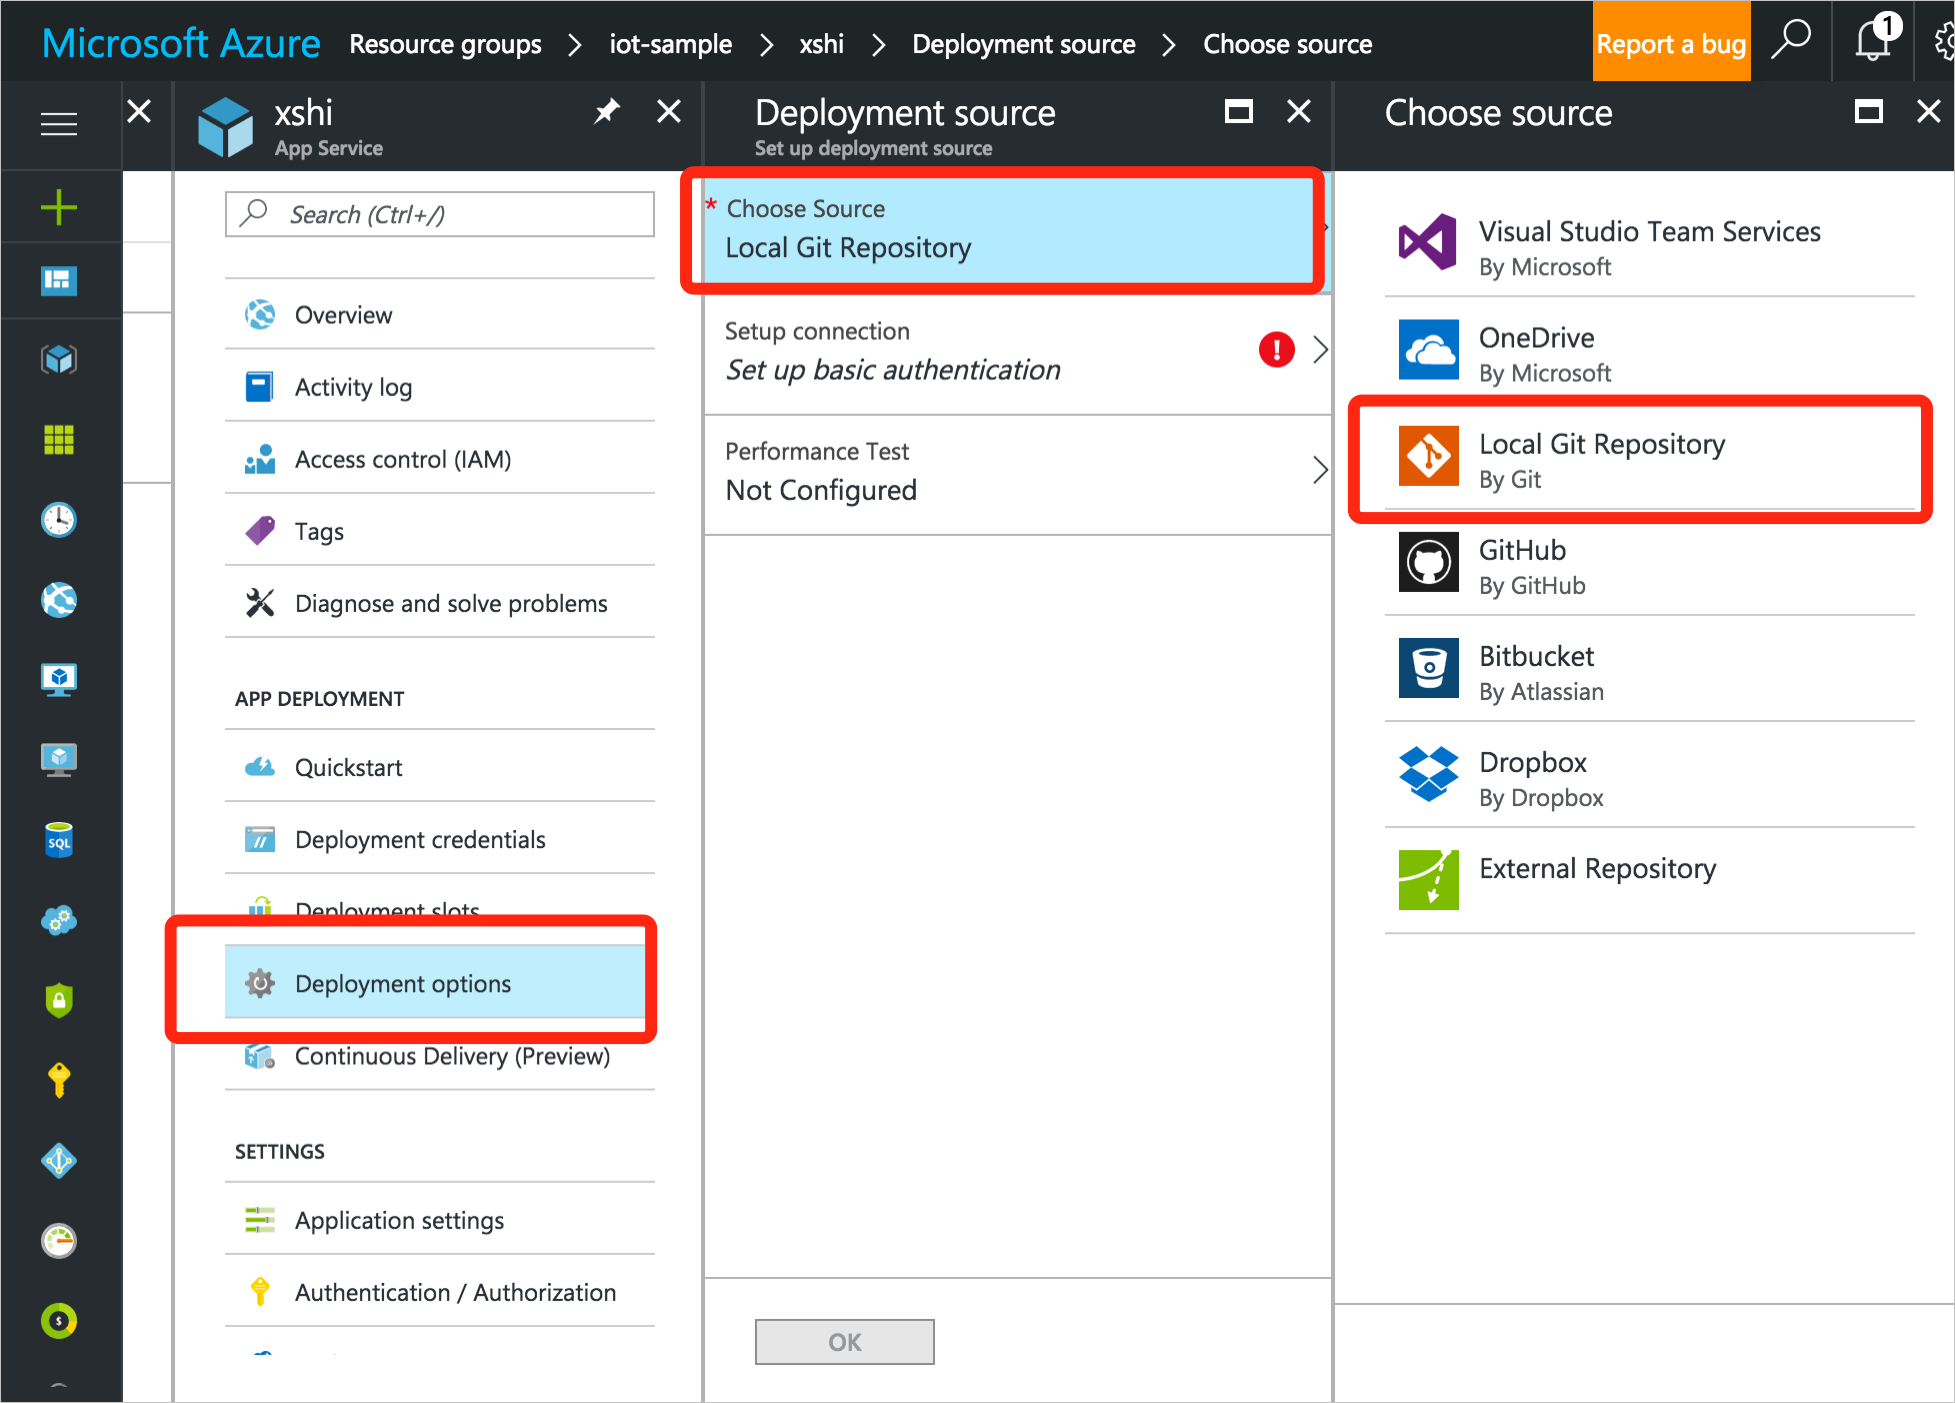
In the web app, click Deployment Options > Choose Source > Local Git Repository.
Click Setup connection, create a user name and password that will be used to connect to the Git repository in Azure, and then click OK.
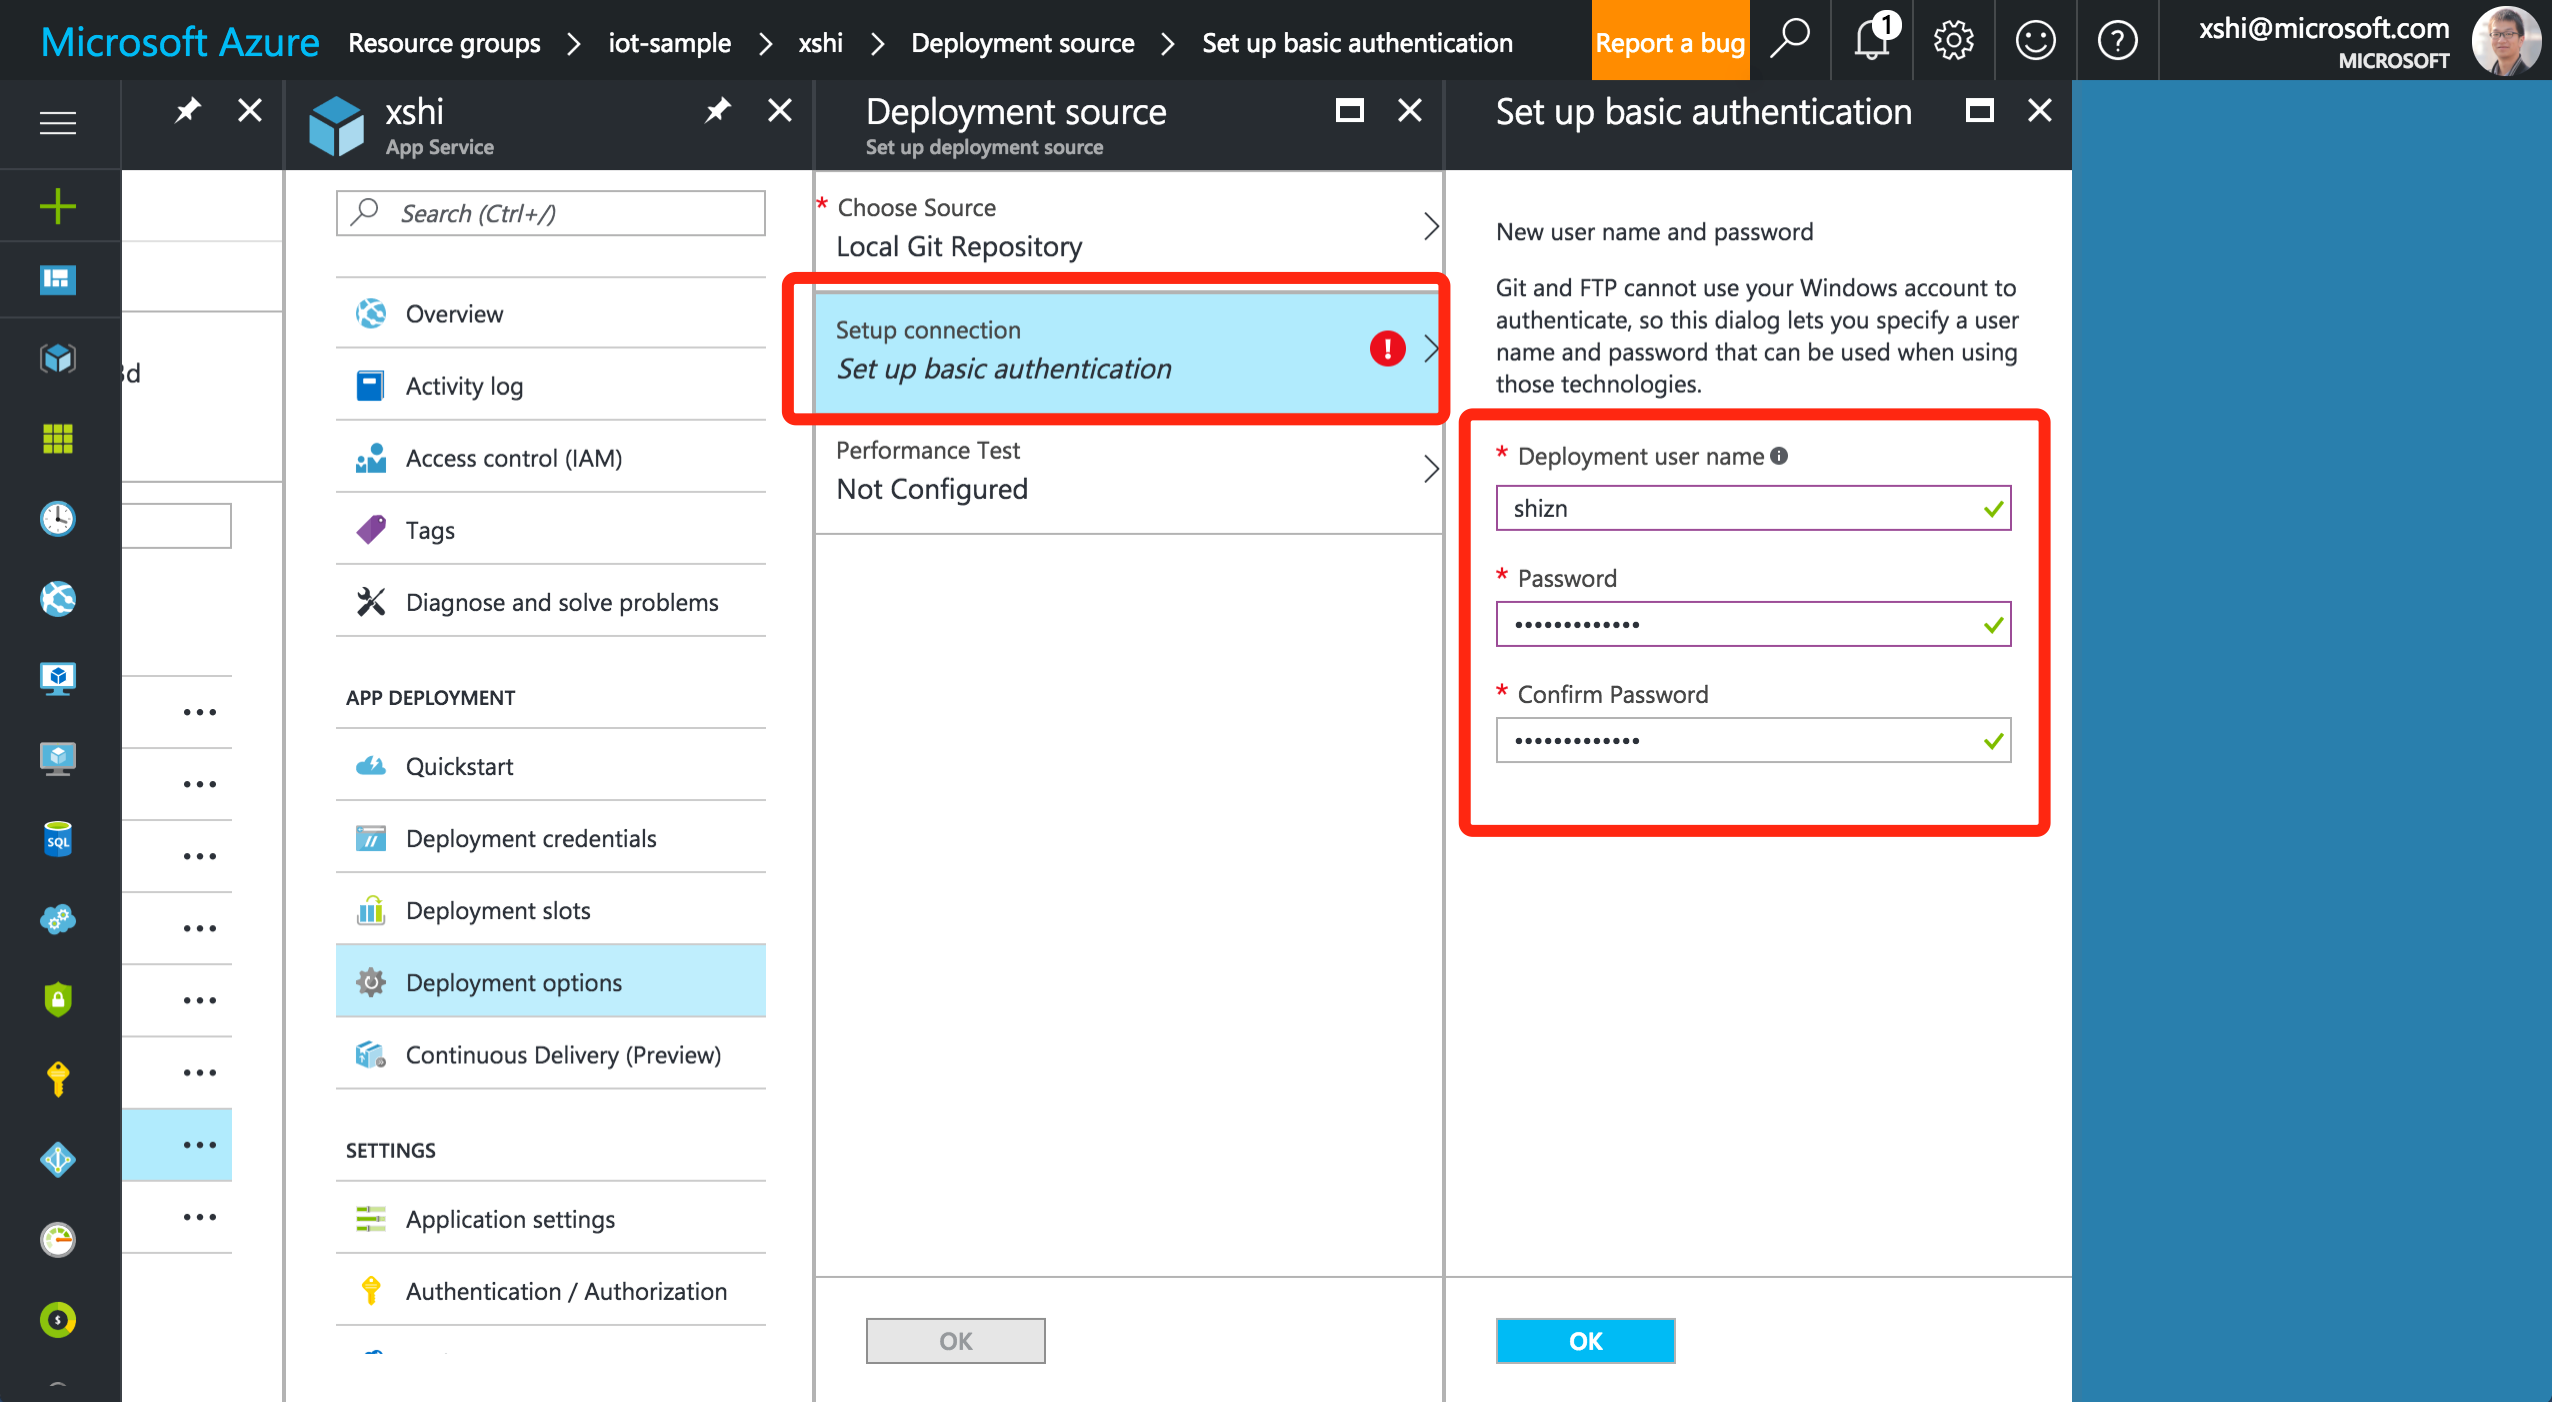
Click OK to finish the configuration.
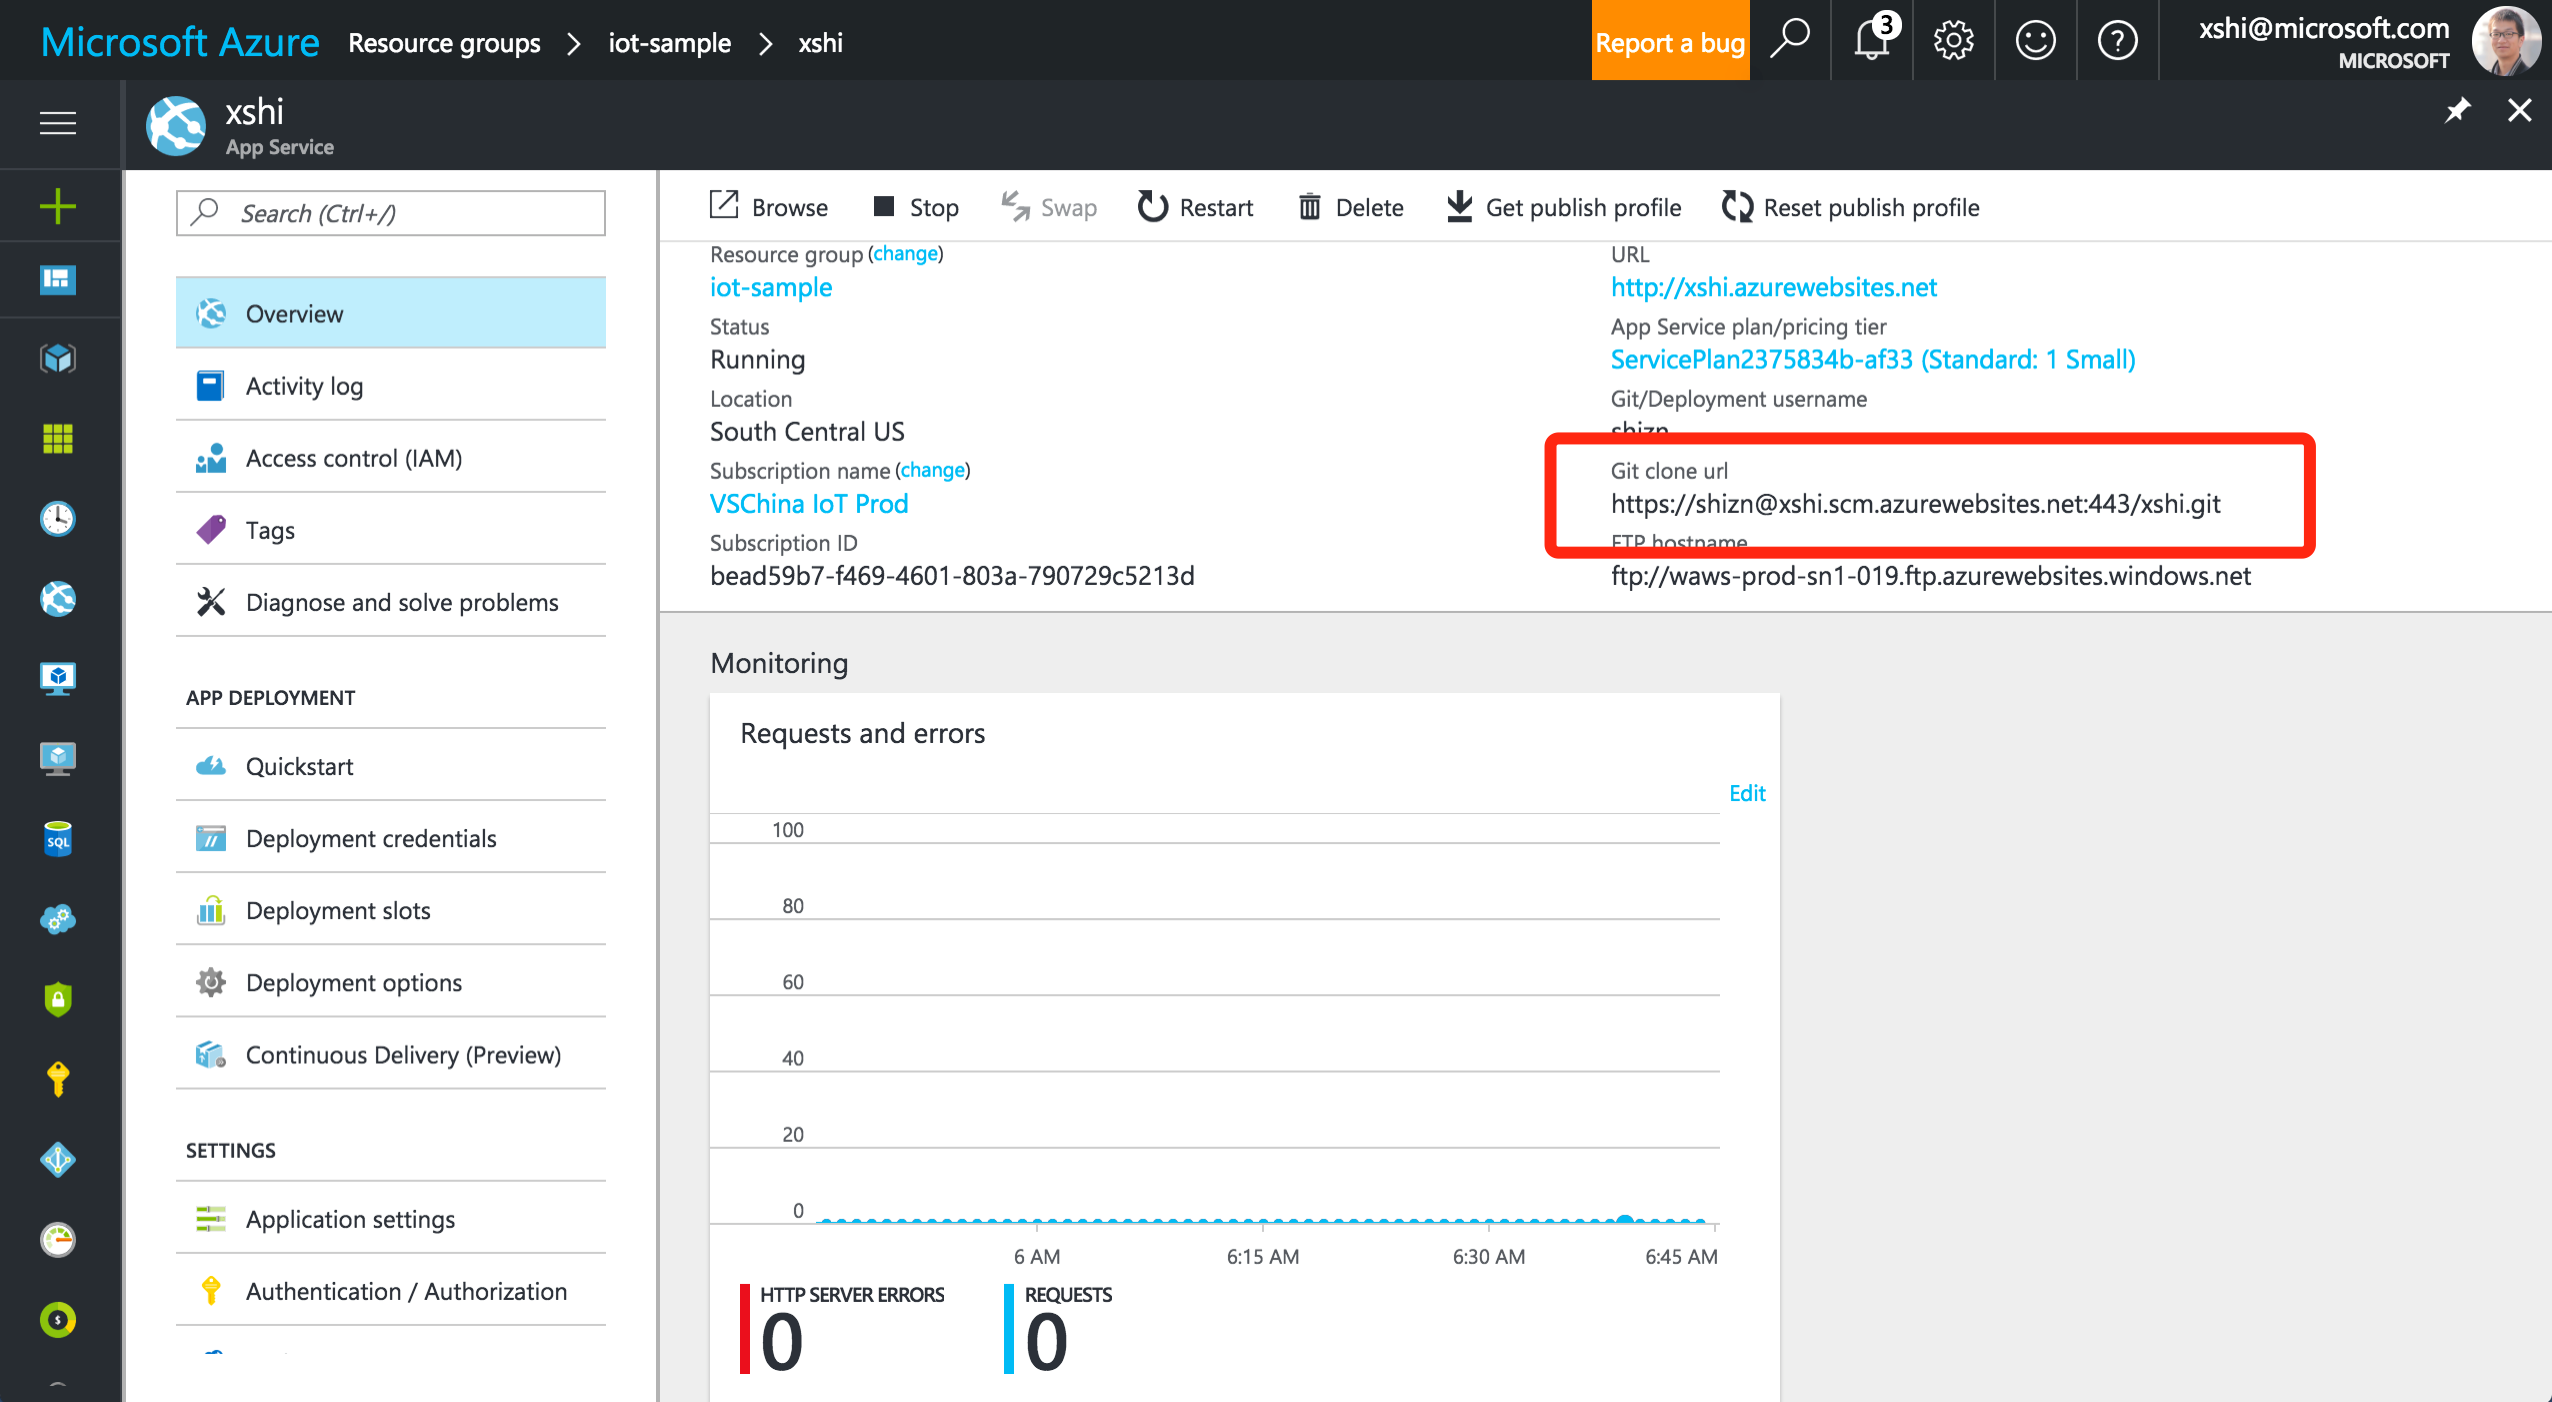
Click Overview and make a note of the value of Git clone url.
Open a command or terminal window on your local computer.
Download the web application from GitHub and upload it Azure for the web app to host. To do this, run the following commands:
git clone https://github.com/Azure-Samples/web-apps-node-iot-hub-data-visualization.git
cd web-apps-node-iot-hub-data-visualization
git remote add webapp <Git clone URL>
git push webapp master:master
[!Note] \
is the URL of the Git repository found on the Overview page of the web app.
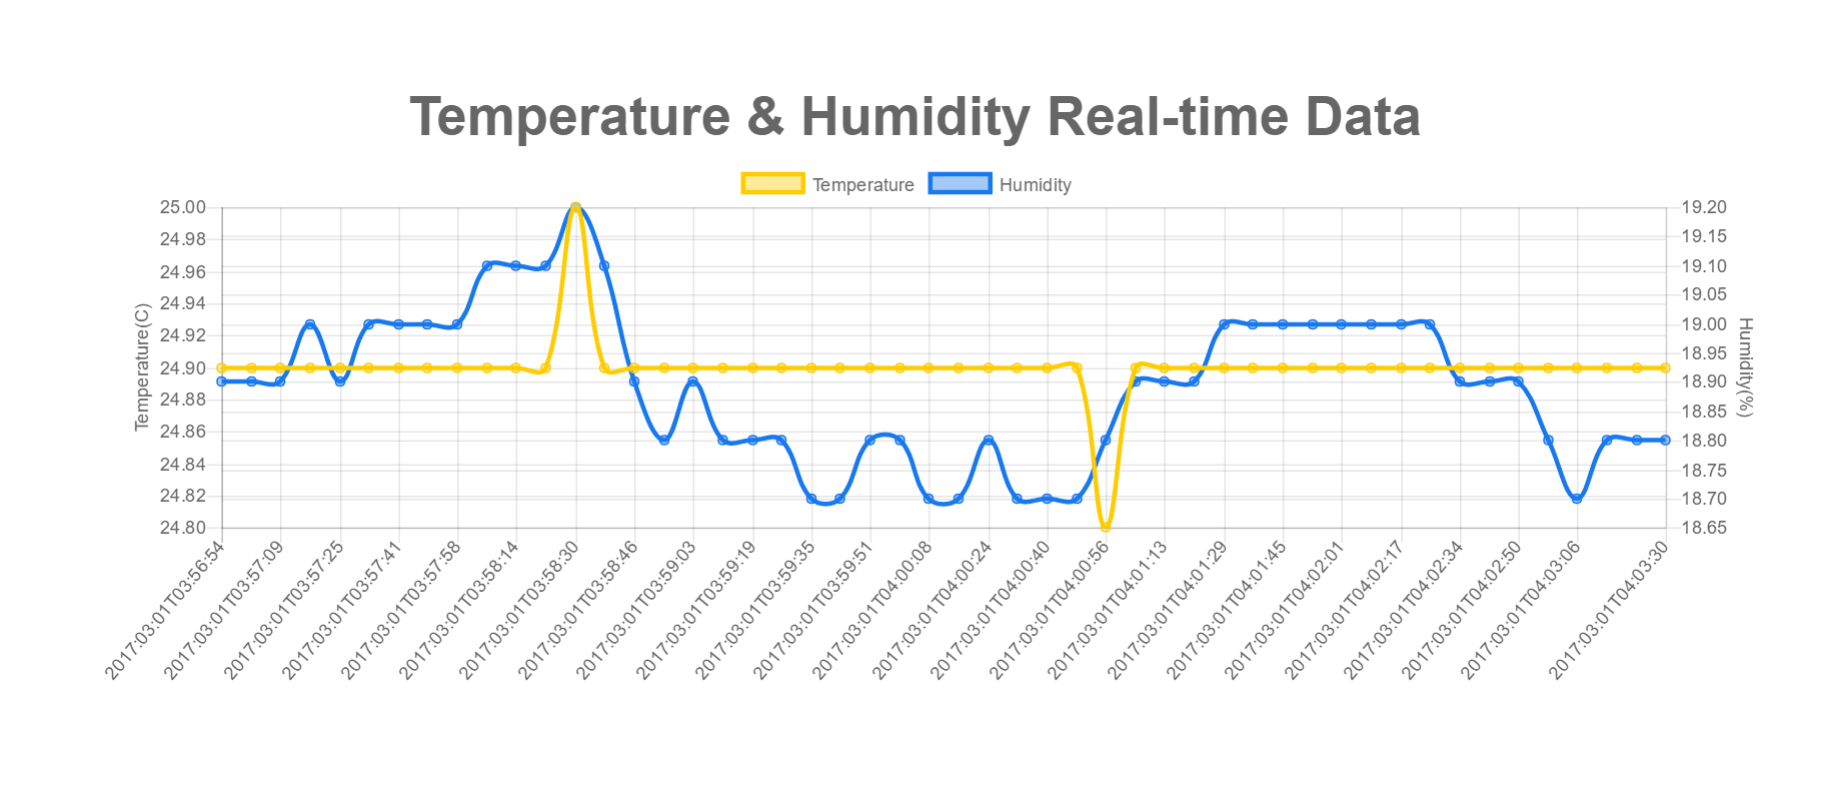
Open the web app to see real-time temperature and humidity data from your IoT hub
On the Overview page of your web app, click the URL to open the web app.

You should see the real-time temperature and humidity data from your IoT hub.
Next steps
You've successfully used an Azure web app to visualize real-time sensor data from your Azure IoT hub.
There is an alternate way to visualize data from Azure IoT Hub. See Use Power BI to visualize real-time sensor data from Azure IoT Hub.
Next steps
You’ve successfully used Power BI to visualize real-time sensor data from your Azure IoT hub. There is an alternate way to visualize data from Azure IoT Hub.