IoT remote monitoring and notifications with Azure Logic Apps connecting your IoT hub and mailbox

[!NOTE] Before you start this tutorial, make sure you’ve completed Setup your device. By Setup your device, you set up your IoT device and IoT hub, and deploy a sample application to run on your device. The application sends collected sensor data to your IoT hub.
Azure Logic Apps provides a way to automate processes as a series of steps. A logic app can connect across various services and protocols. It begins with a trigger such as 'When an account is added', and followed by a combination of actions, one like 'sending a push notification'. This feature makes Logic Apps a perfect IoT solution for IoT monitoring, such as staying alert for anomalies, among other usage scenarios.
What you learn
You learn how to create a logic app that connects your IoT hub and your mailbox for temperature monitoring and notifications. When the temperature is above 30 C, the client application marks temperatureAlert = "true" in the message it sends to your IoT hub. The message triggers the logic app to send you an email notification.
What you do
- Create a service bus namespace and add a queue to it.
- Add an endpoint and a routing rule to your IoT hub.
- Create, configure, and test a logic app.
What you need
- Tutorial Setup your device completed which covers the following requirements:
- An active Azure subscription.
- An Azure IoT hub under your subscription.
- A client application that sends messages to your Azure IoT hub.
Create service bus namespace and add a queue to it
Create a service bus namespace
- On the Azure portal, click New > Enterprise Integration > Service Bus.
Provide the following information:
Name: The name of the service bus.
Pricing tier: Click Basic > Select. The Basic tier is sufficient for this tutorial.
Resource group: Use the same resource group that your IoT hub uses.
Location: Use the same location that your IoT hub uses.
Click Create.
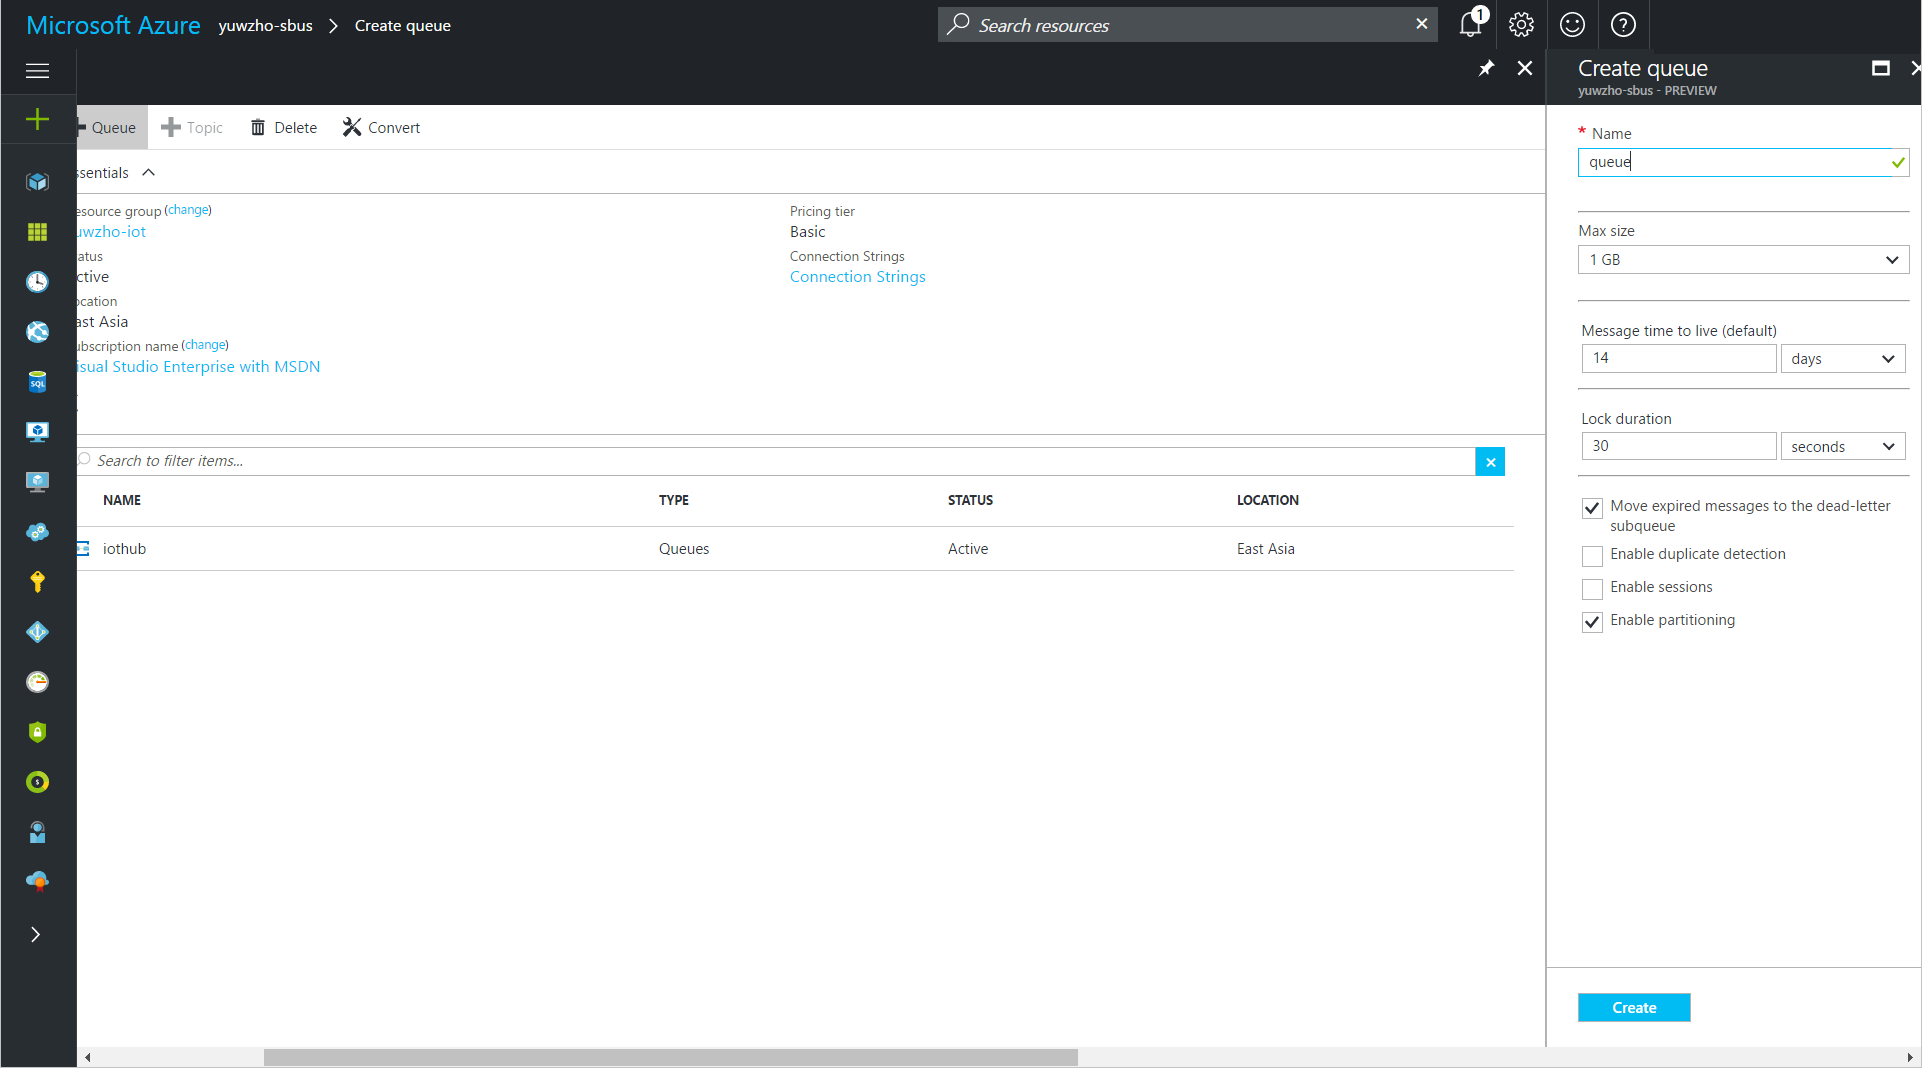
Add a service bus queue
- Open the service bus namespace, and then click + Queue.
- Enter a name for the queue and then click Create.
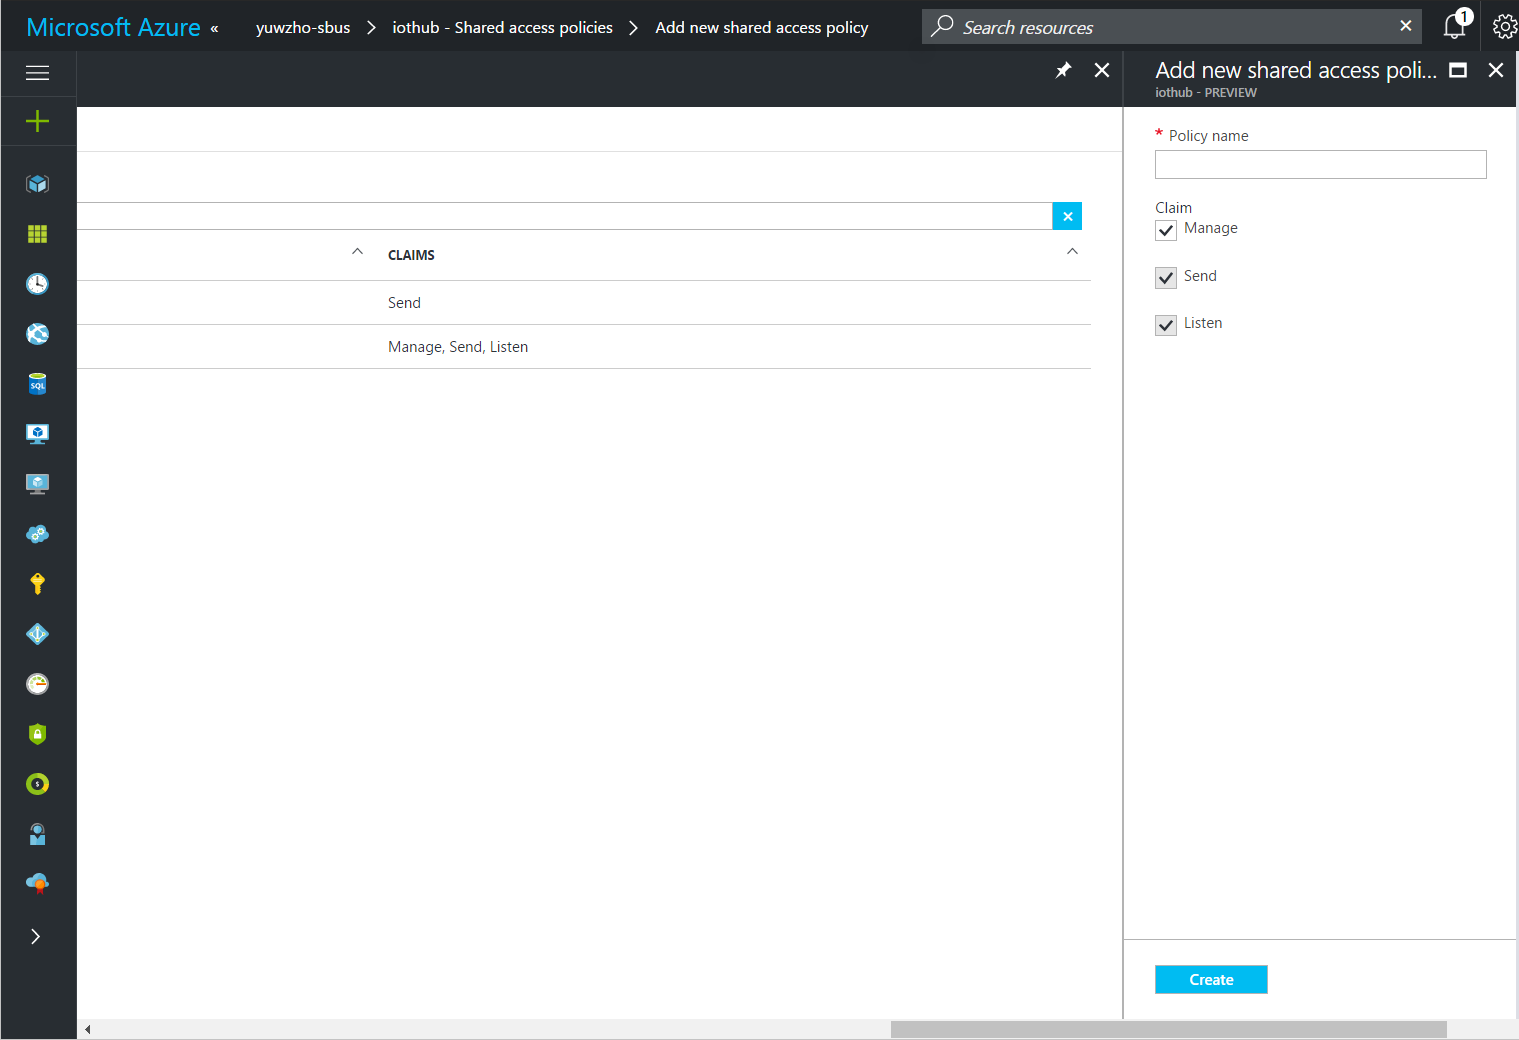
- Open the service bus queue, and then click Shared access policies > + Add.
Enter a name for the policy, check Manage, and then click Create.
Add an endpoint and a routing rule to your IoT hub
Add an endpoint
- Open your IoT hub, click Endpoints > + Add.
Enter the following information:
Name: The name of the endpoint.
Endpoint type: Select Service Bus Queue.
Service Bus namespace: Select the namespace you created.
Service Bus queue: Select the queue you created.
Click OK.

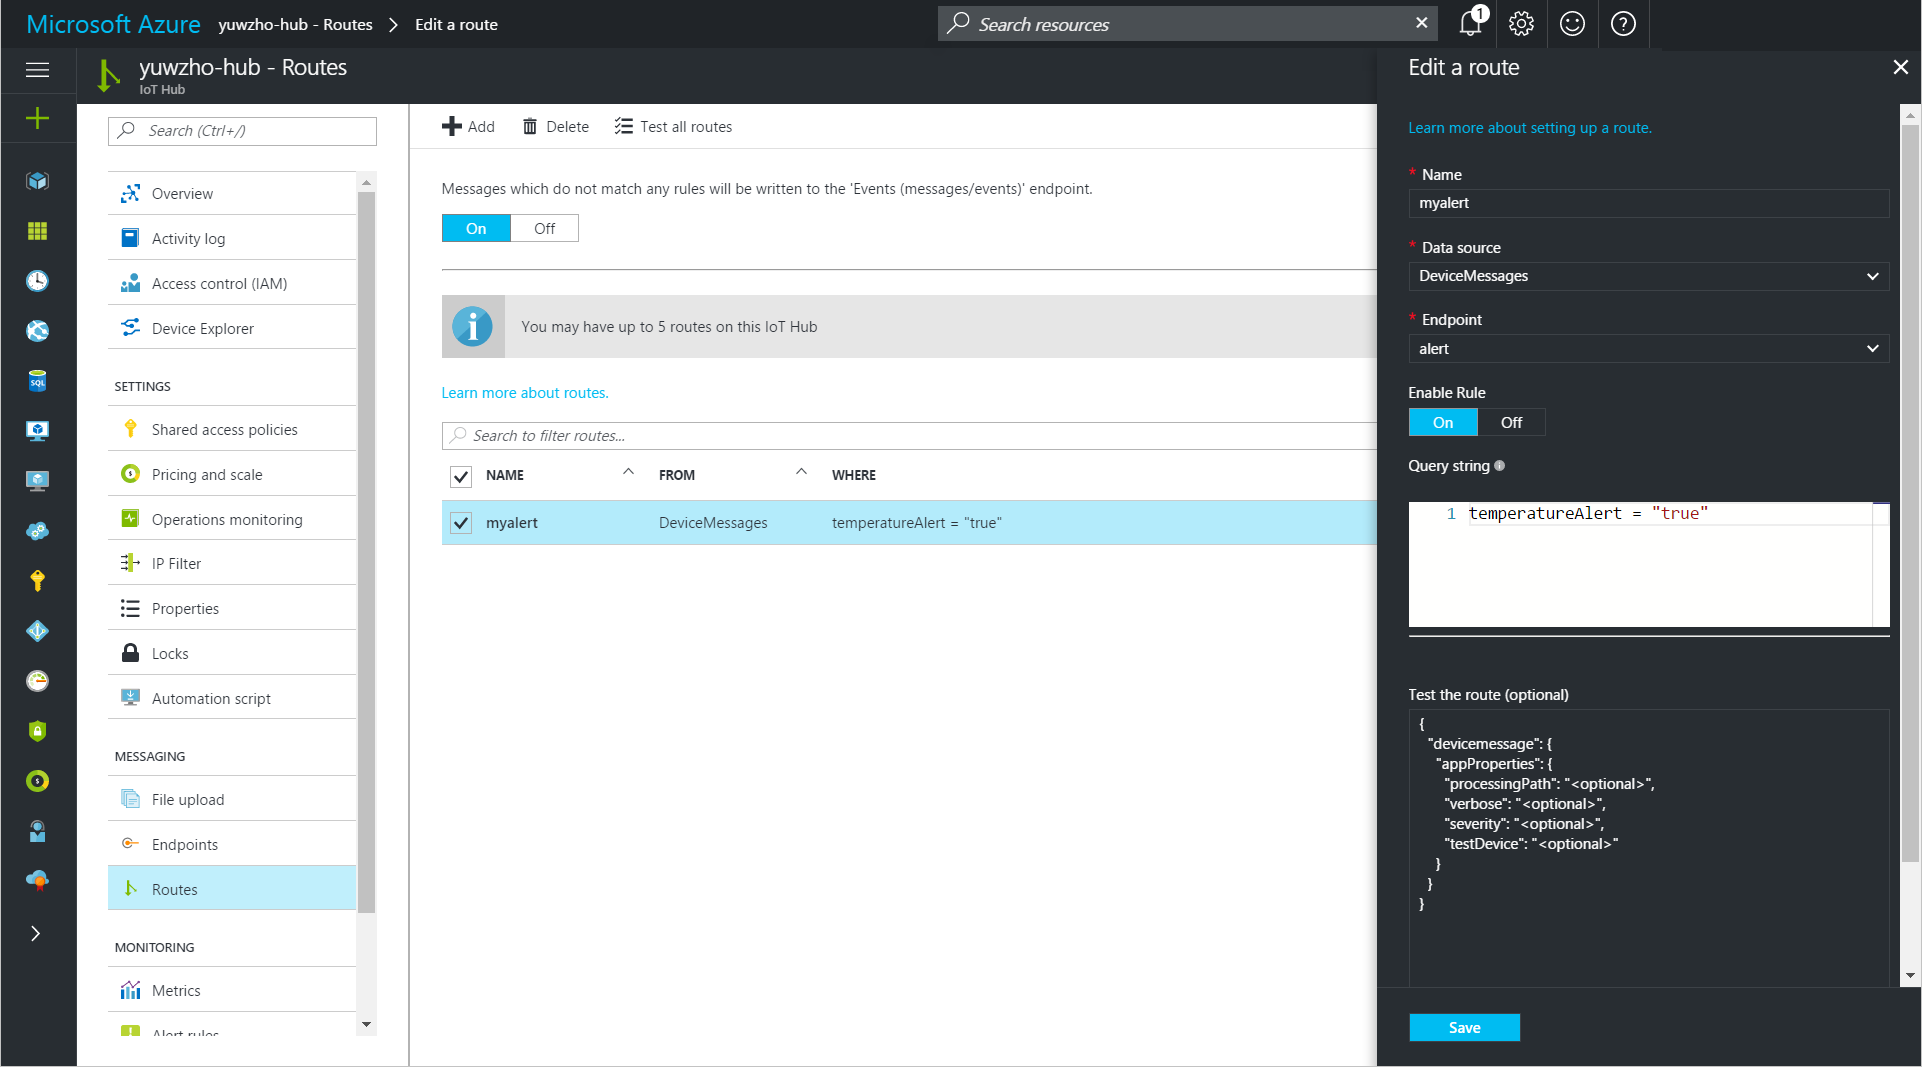
Add a routing rule
- In your IoT hub, click Routes > + Add.
Enter the following information:
Name: The name of the routing rule.
Data source: Select DeviceMessages.
Endpoint: Select the endpoint you created.
Query string: Enter
temperatureAlert = "true".Click Save.
Create and configure a logic app
Create a logic app
- In the Azure portal, click New > Enterprise Integration > Logic App.
Enter the following information:
Name: The name of the logic app.
Resource group: Use the same resource group that your IoT hub uses.
Location: Use the same location that your IoT hub uses.
- Click Create.
Configure the logic app
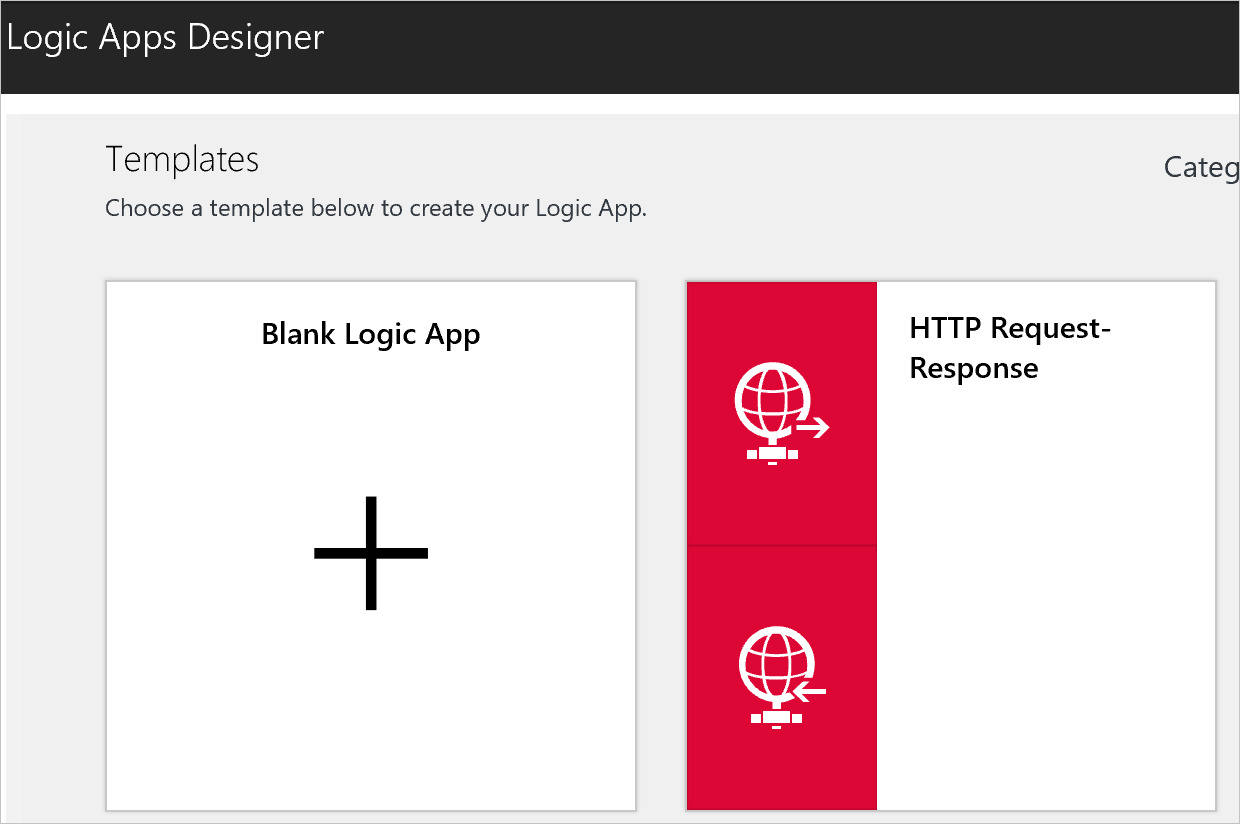
- Open the logic app that opens into the Logic Apps Designer.
In the Logic Apps Designer, click Blank Logic App.
Click Service Bus.

Click Service Bus – When one or more messages arrive in a queue (auto-complete).
Create a service bus connection.
- Enter a connection name.
Click the service bus namespace > the service bus policy > Create.
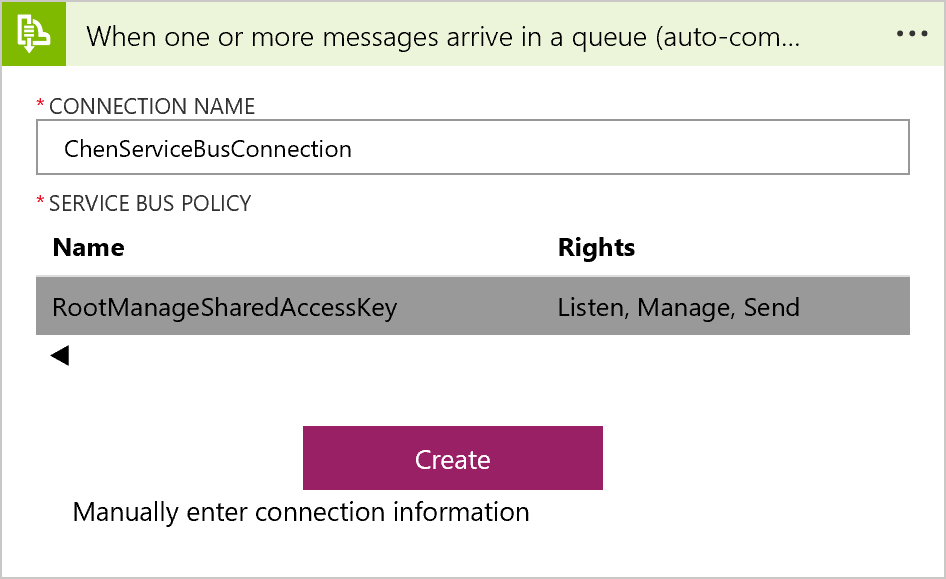
Click Continue after the service bus connection is created.
Select the queue that you created and enter
175for Maximum message count
- Click "Save" button to save the changes.
Create an SMTP service connection.
- Click New step > Add an action.
Type
SMTP, click the SMTP service in the search result, and then click SMTP - Send Email.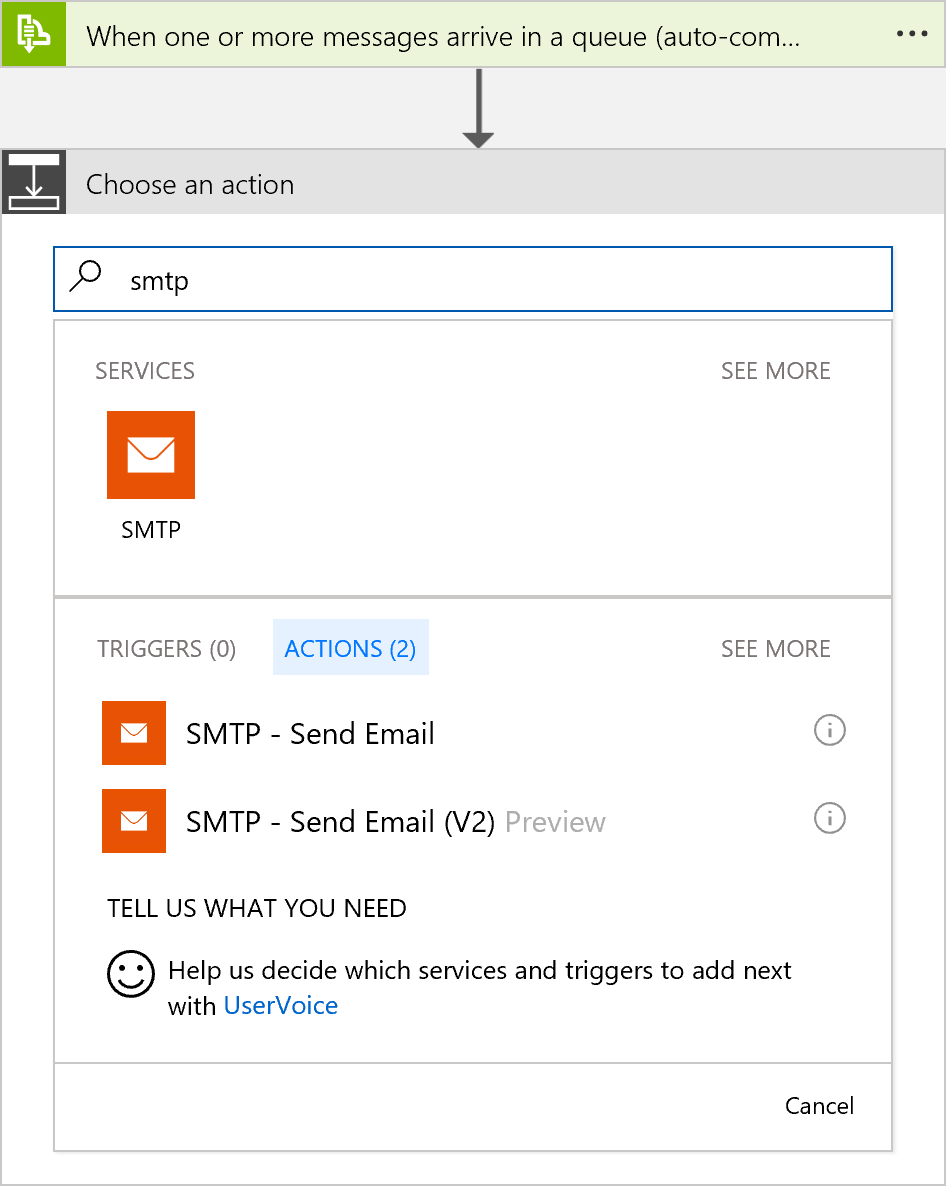
Enter the SMTP information of your mailbox, and then click Create.
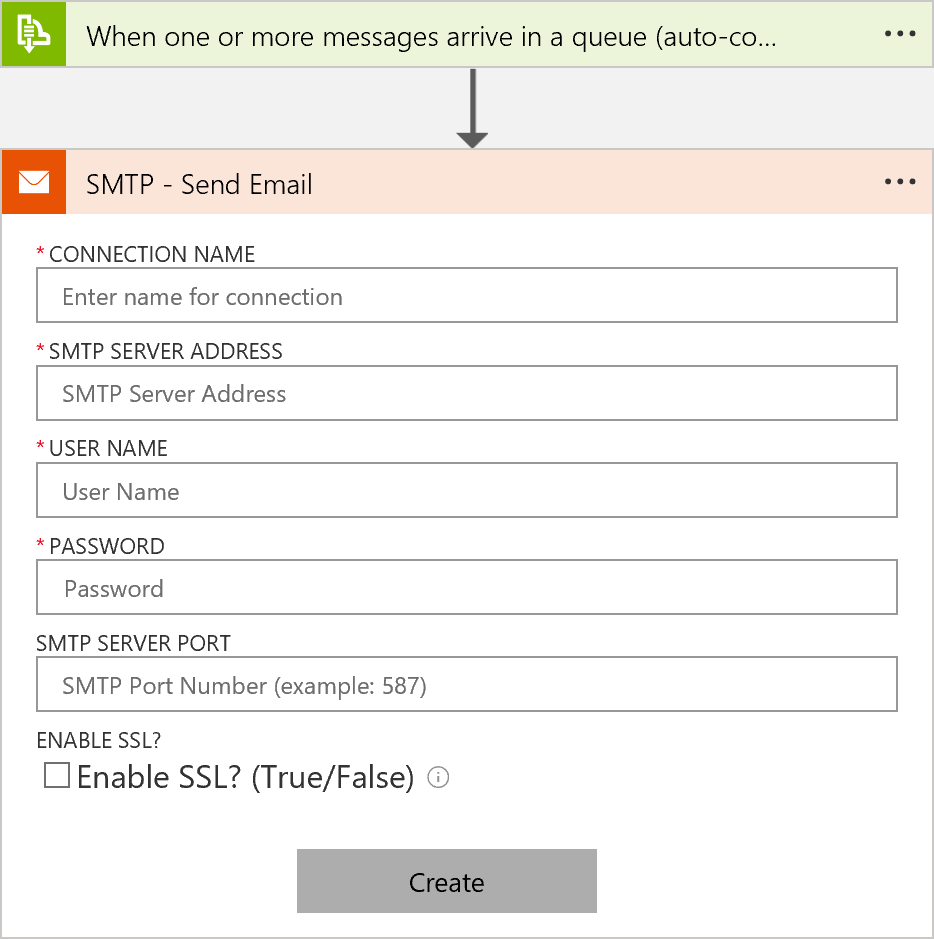
Get the SMTP information for Hotmail/Outlook.com, Gmail, and Yahoo Mail.
- Enter your email address for From and To, and
High temperature detectedfor Subject and Body. - Click Save.
The logic app is in working order when you save it.
Test the logic app
- Start the client application that you deploy to your device in Connect ESP8266 to Azure IoT Hub.
- Increase the environment temperature around the SensorTag to be above 30 C. For example, light a candle around your SensorTag.
You should receive an email notification sent by the logic app.
[!NOTE] Your email service provider may need to verify the sender identity to make sure it is you who sends the email.
Next steps
You have successfully created a logic app that connects your IoT hub and your mailbox for temperature monitoring and notifications.